
How to Apply an Iron On Patch
Iron-on patches are a great way to embellish clothes made using 100% cotton material. These iron-on patch instructions will walk you through the entire process of securing an iron-on patch for a garment. It includes all the necessary steps, from getting your project ready to effectively applying heat and pressure for optimal patch adhesion.
Key Takeaways
Begin by checking the garment’s care label to ensure it can withstand the heat required to iron on the patch.
Cover the patch with a thin cloth or parchment paper to protect the garment and patch while ironing.
To iron-on the patch correctly, allow the garment to cool for at least 24 hours after application.
Preparing Your Garment and Embroidered Patch for Application
Before you begin attaching your iron-on patch, it’s crucial to prepare both the patch and your garment properly. First and foremost, inspect the care label on your garment to verify that it can withstand the heat necessary for applying an iron-on patch. Most iron-on patch instructions fail to stress that the best material for this application is 100% cotton. This step is essential to avoid any damage to your garment or project during application. Some iron-on patches can adhere with medium high heat settings that are good for cotton blends or synthetic fibers such as polyester. Unless expressly stated by the manufacturer’s instructions assume that your iron-on patches are made specifically for 100% cotton that can withstand high heat. Iron patches to 100% cotton fabric for best adhesion.
After confirming that your fabric can safely be ironed, smooth out the garment on a heat-resistant surface such as an ironing board. This ensures a flat surface to aid with the patch’s adhesion. Make sure there are no creases or uneven areas where you’ll iron patches.
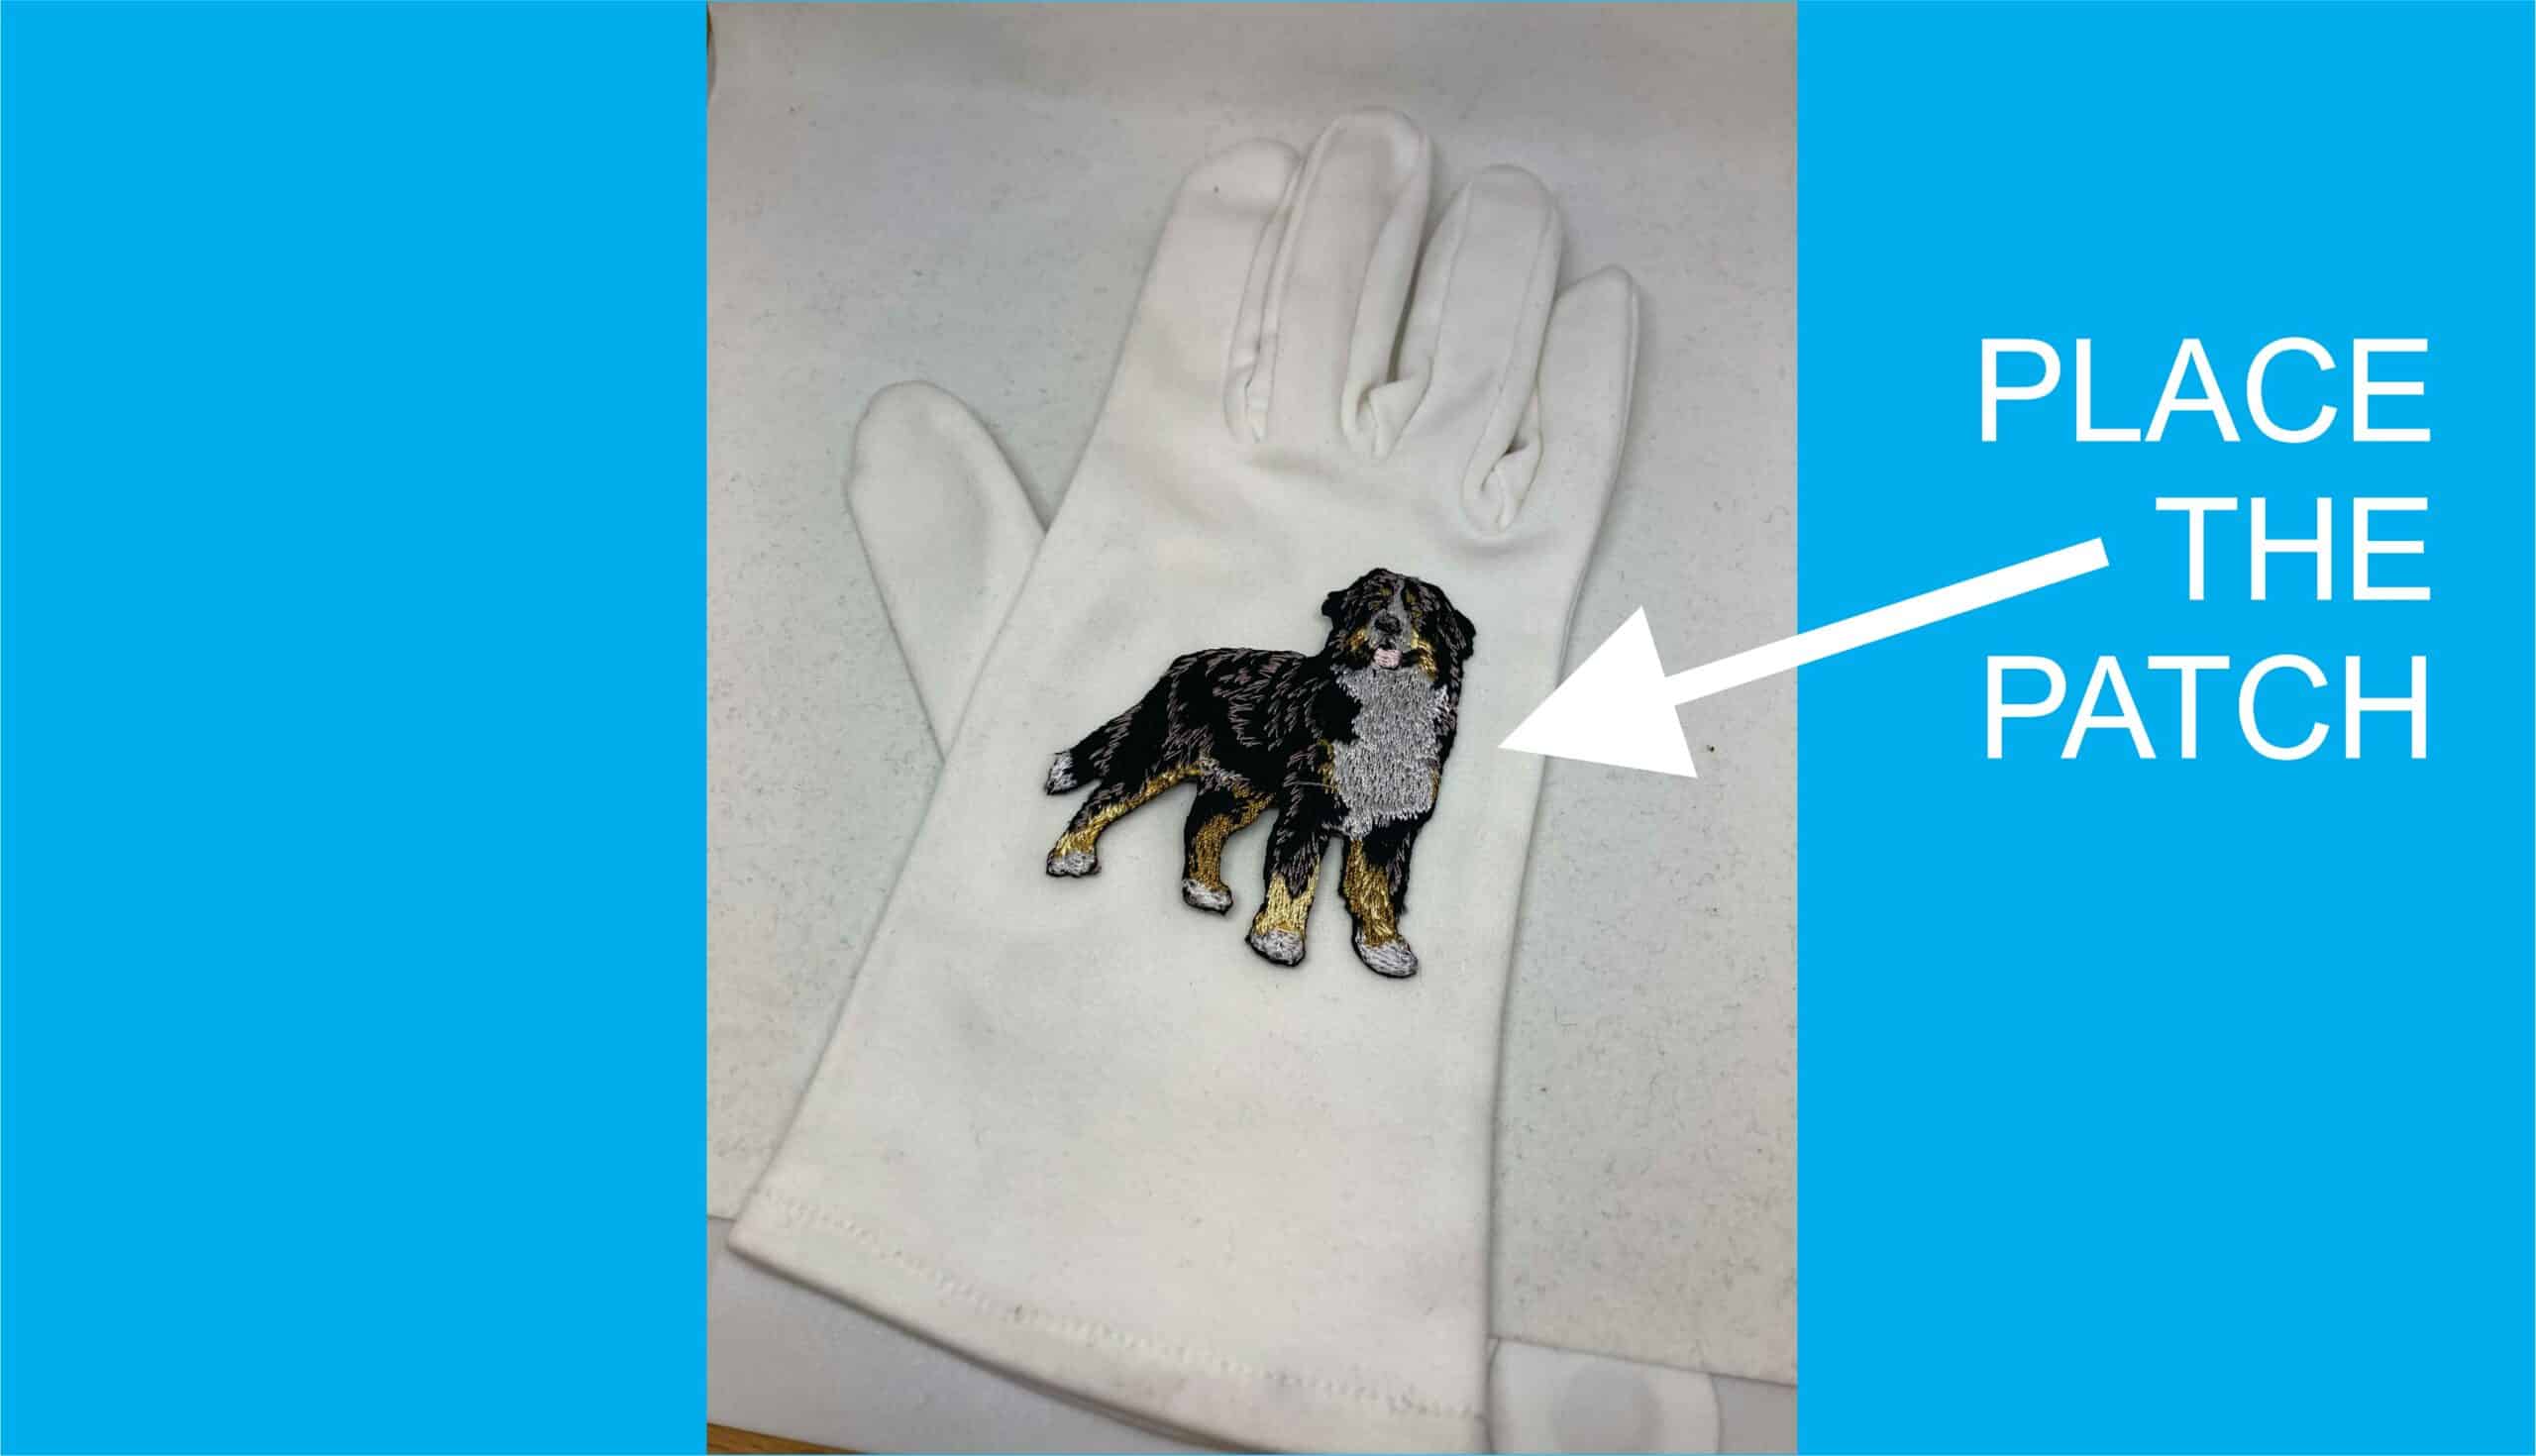
When everything is set up correctly, carefully place your patch on the garment in its intended spot. Double-check its positioning, as altering its location will not be possible once it is attached. Remember to position properly and then iron patches.
To enhance adhesion, gently warm the fabric before placing the patch. Preheating helps activate the adhesive backing for a stronger bond. Using the right amount of pressure throughout the process ensures proper attachment without damaging or discoloring the fabric or patch due to excessive heat.
Set Your Iron to the Right Temperature
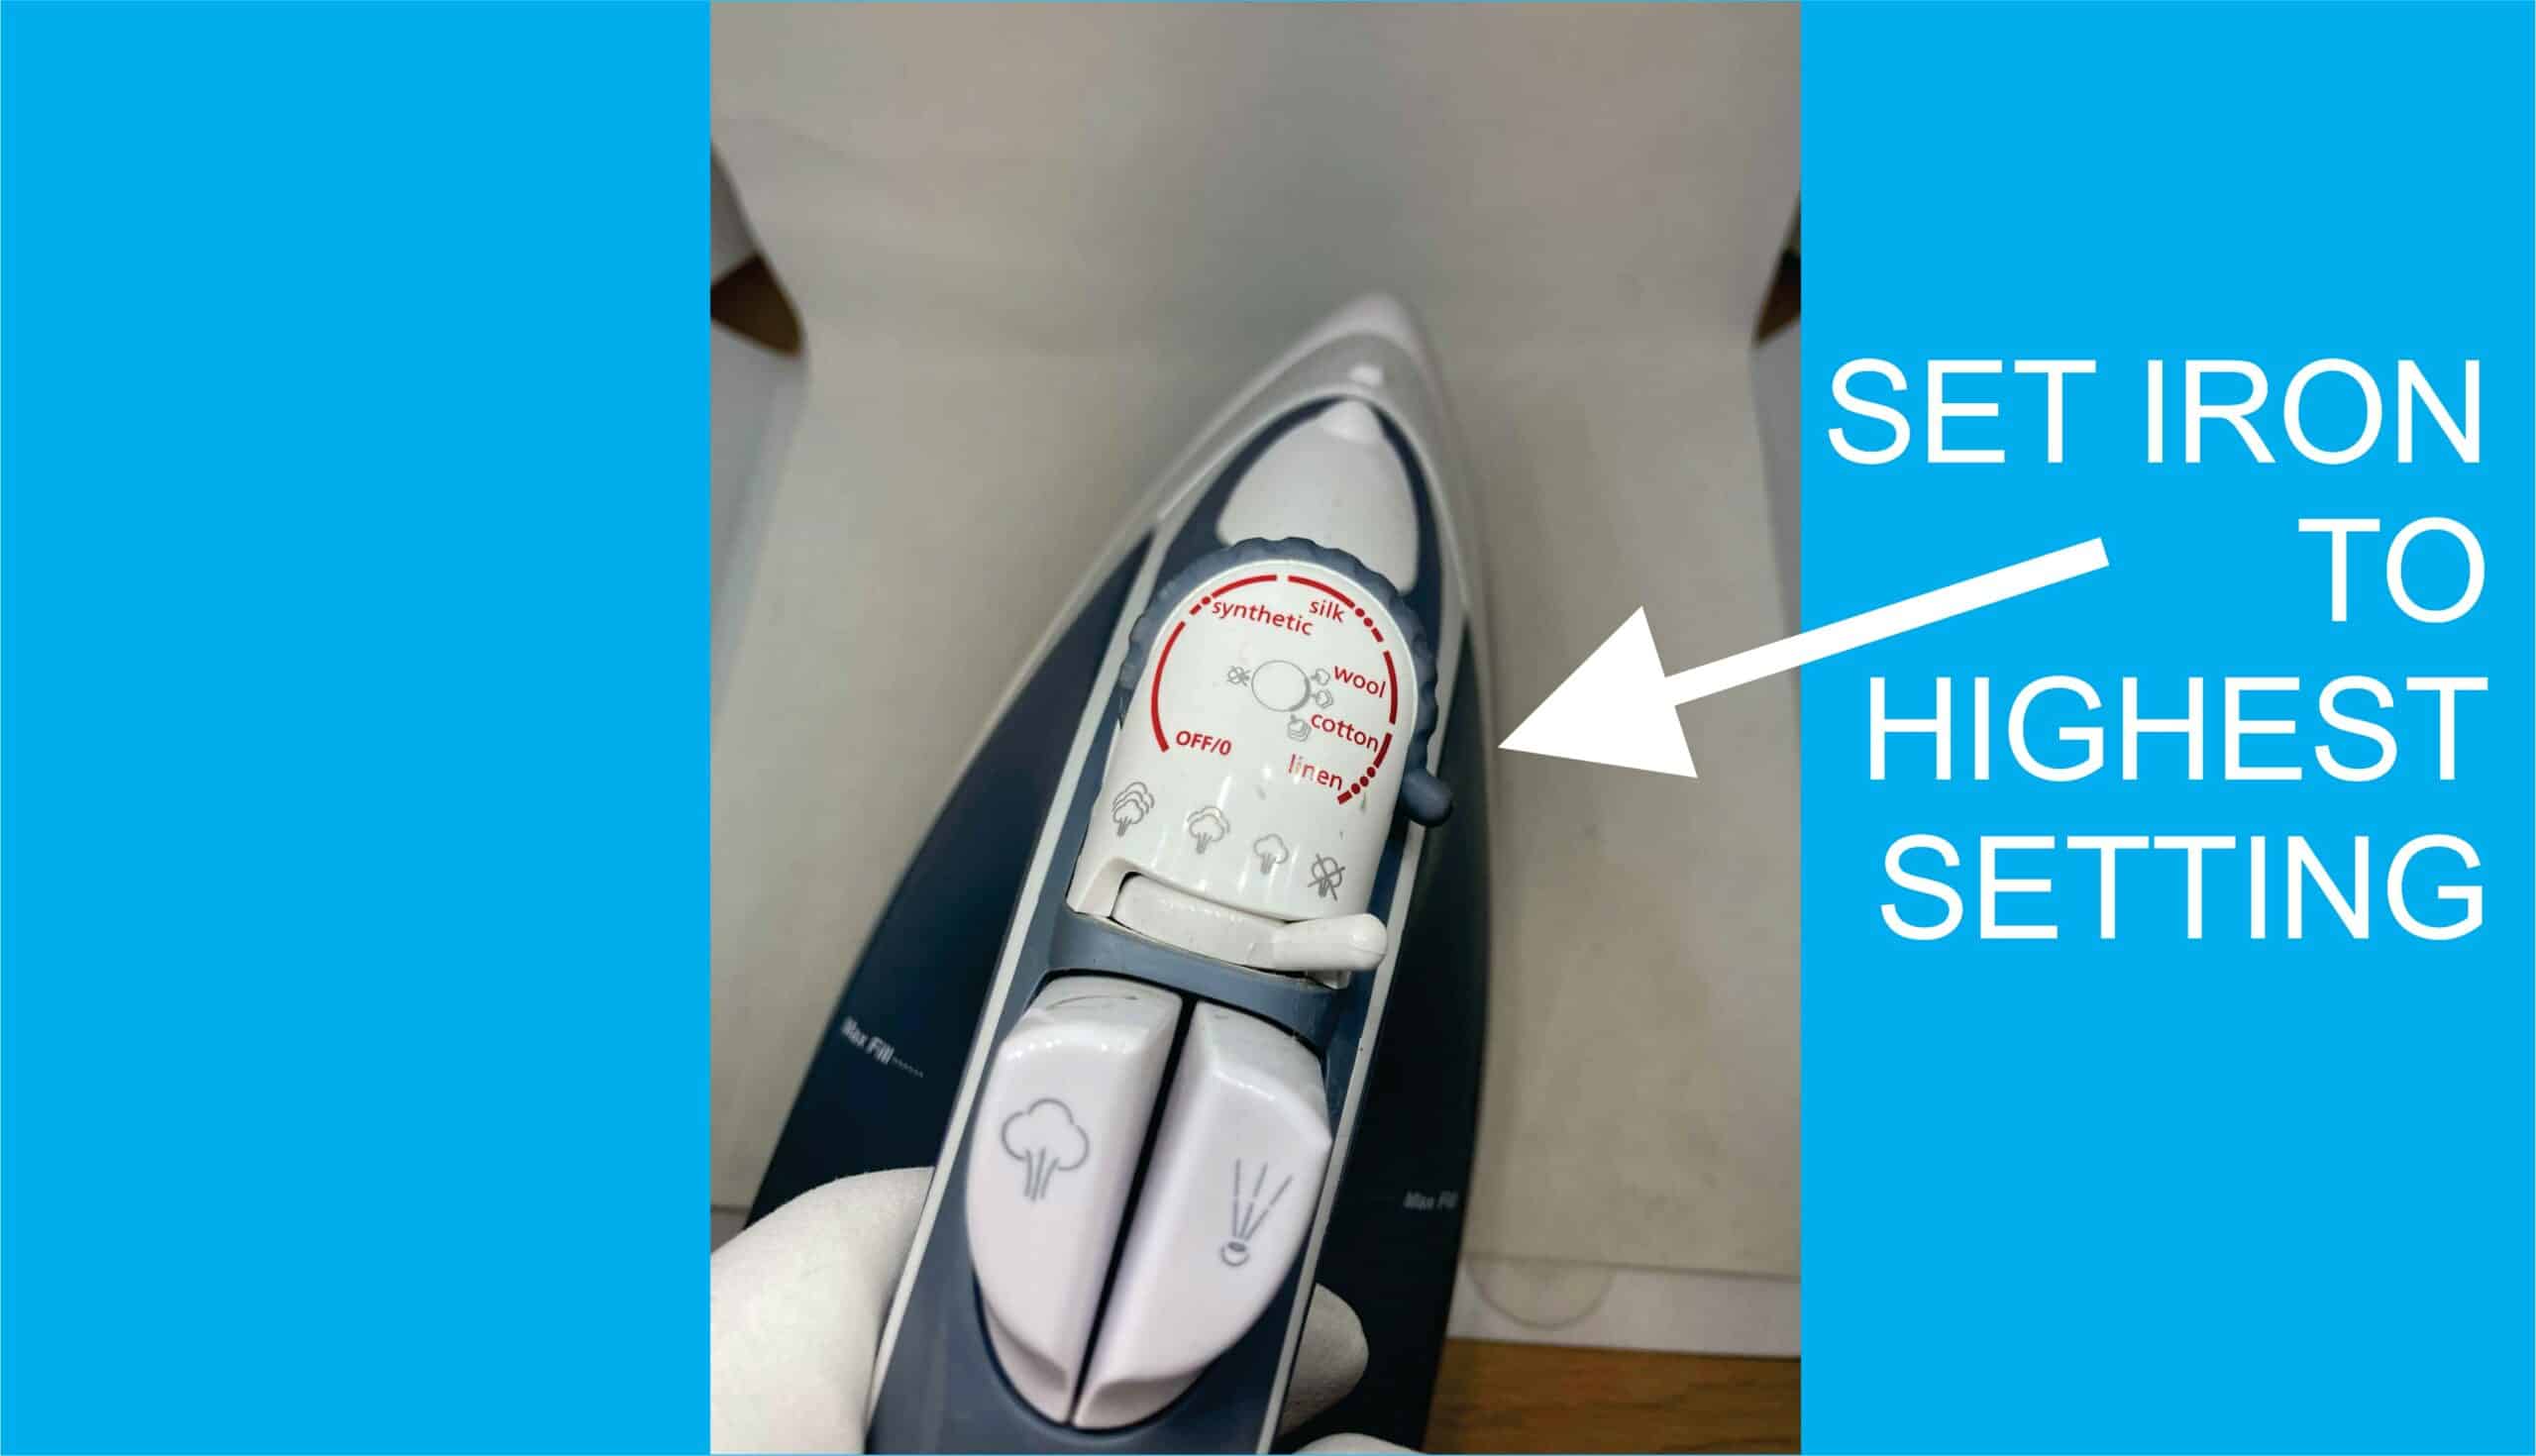
To get the patch fully stuck on, a high temperature setting on the iron is needed to attach patches to clothes. The correct setting is crucial for applying iron-on patches. Begin by heating your iron to 370 degrees Fahrenheit or as high as your iron will allow, which typically corresponds to the cotton setting on many standard irons. Make sure the steam setting is off. Before applying the patch, with the hot iron perform a heat test on an inconspicuous part of the fabric to prevent potential damage to your garment. Once you are confident that the fabric will withstand the dry heat setting, make sure the fabric is smooth and does not have any folds or creases. If it does, use the hot iron to smooth out the wrinkles.
Cover with a thin Cloth over the Patch or Sheet of Parchment Paper
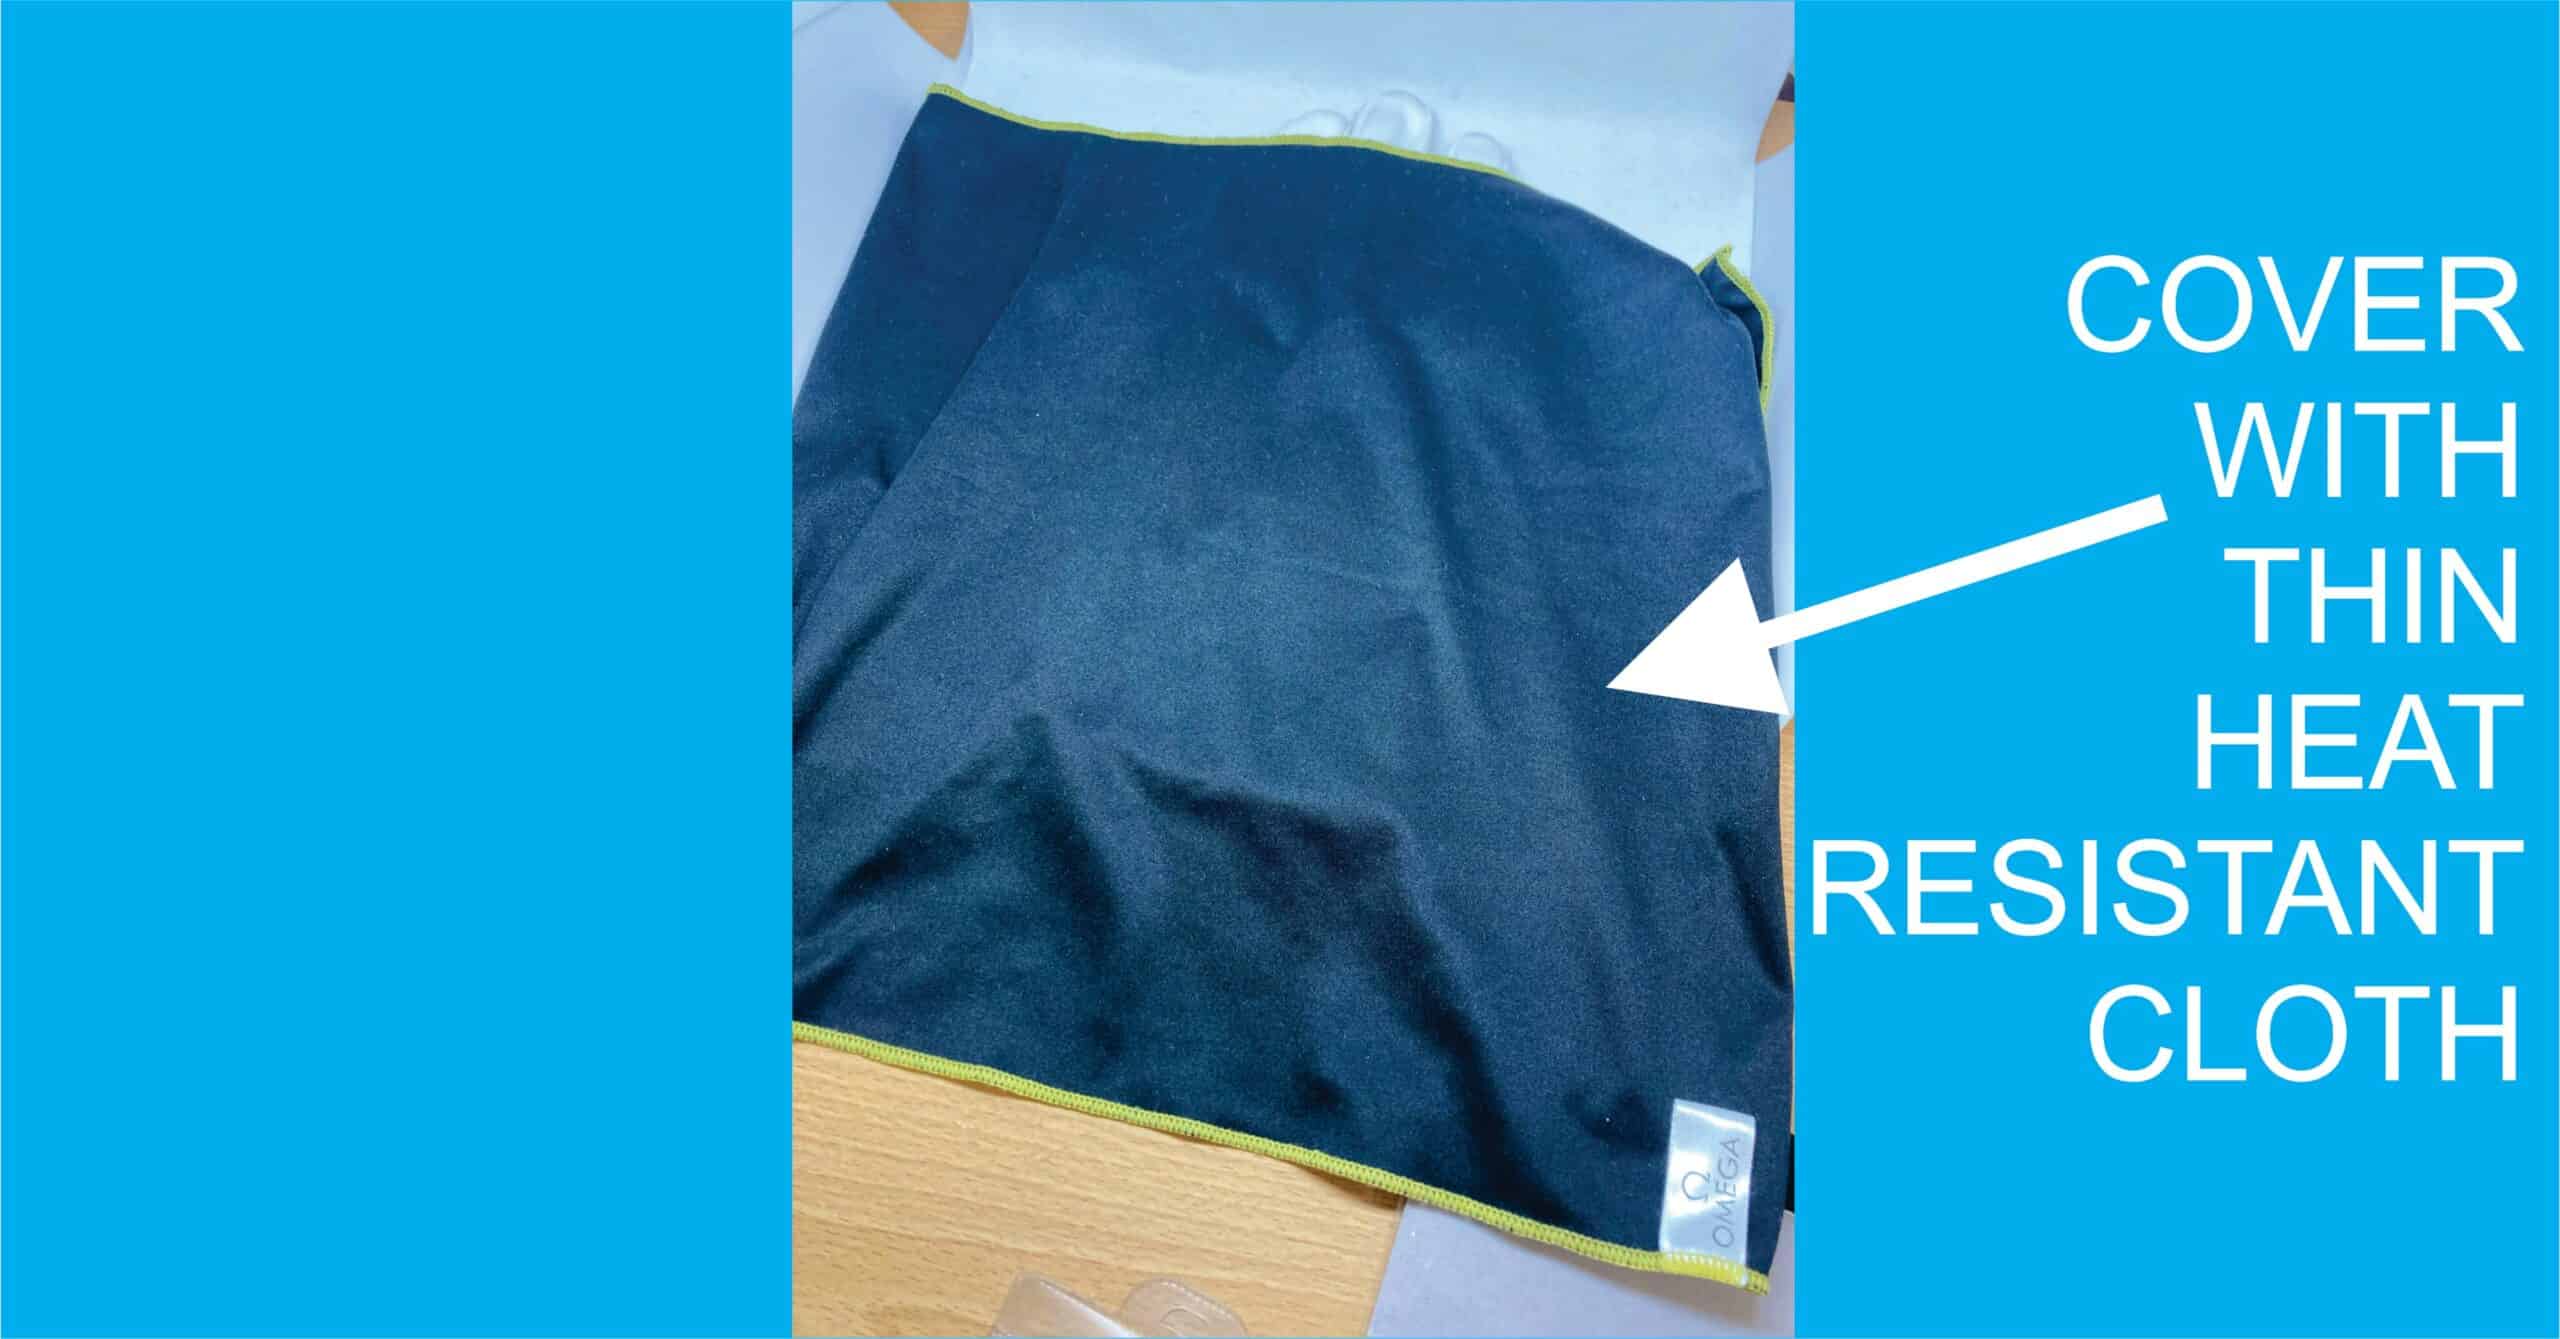
To safeguard both the embroidered patch and the garment, place a thin cloth over the patch, 100% cotton fabric or parchment paper will work well. This barrier prevents direct contact between the hot iron and the patch, reducing the risk of damage during the iron-on process. By placing the cloth over the patch you will also avoid the possibility of excess iron on adhesive backing sticking directly to your iron. Iron-on embroidered patches benefit from this protective measure with the thin cloth as it ensures both the garment and patch remain undamaged, allowing for a strong, long-lasting bond without the risk of burning or melting.
Apply Firm Pressure and Heat
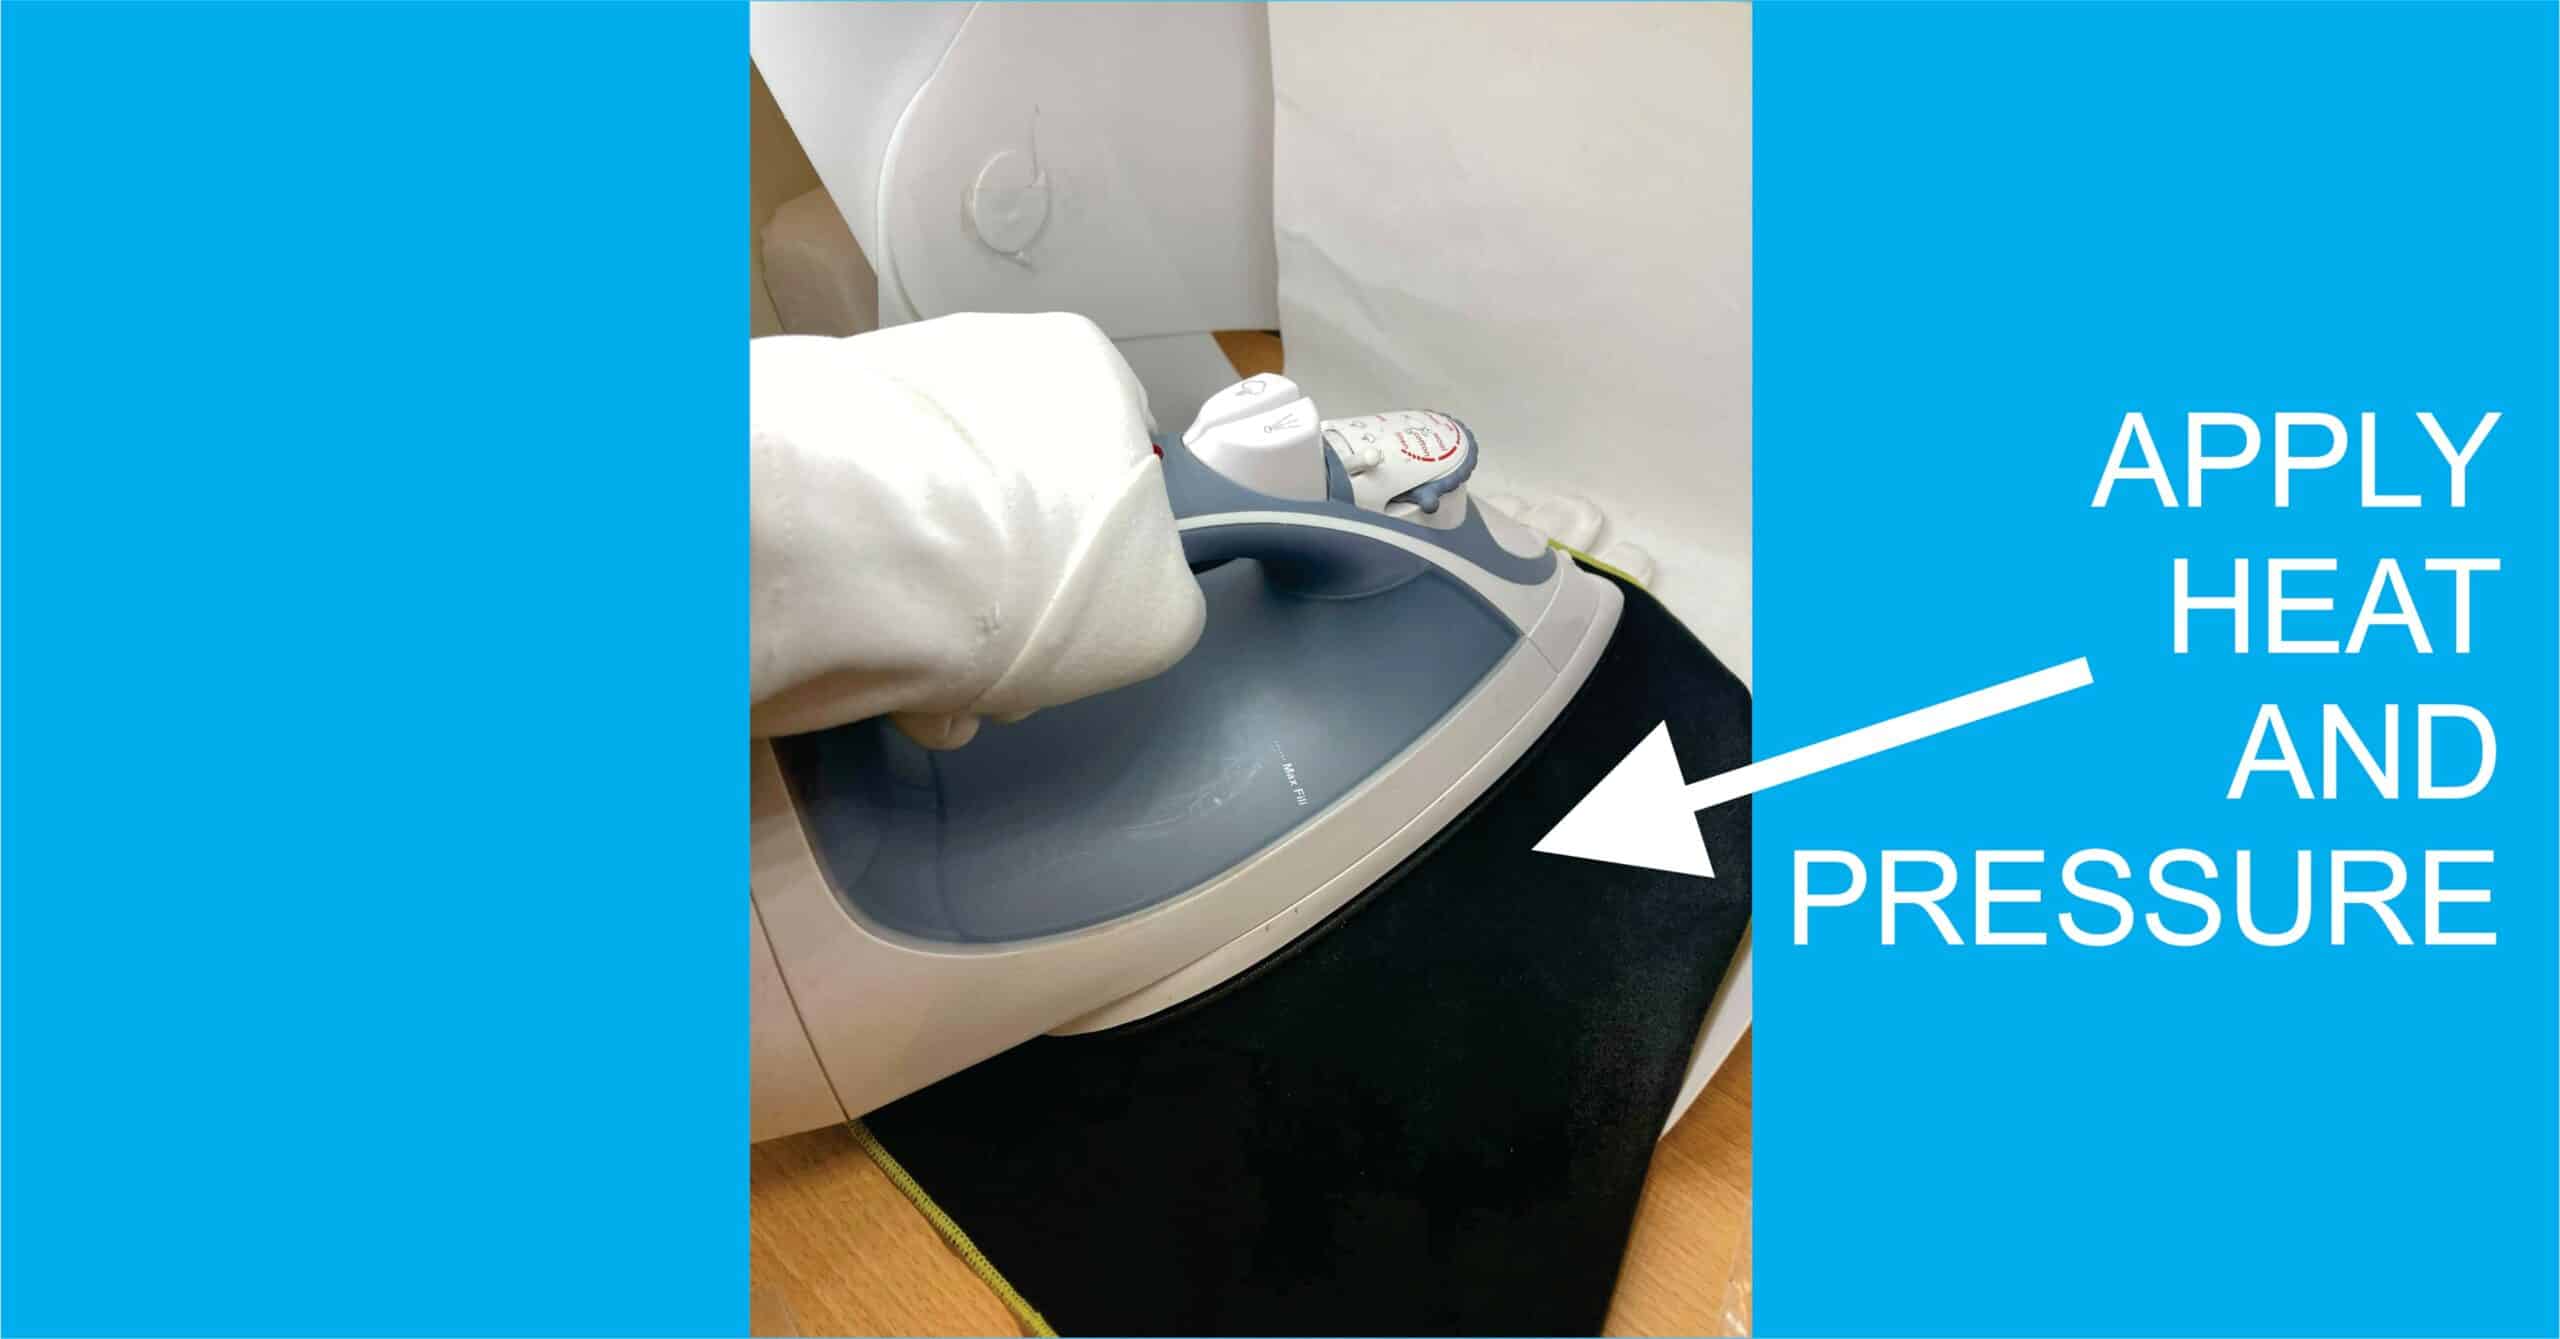
When using an ironing board set the height of the board so you can apply firm pressure to iron patches over your project area. Position your iron directly over the patch on a flat surface and press firmly, holding it in place for approximately 30 seconds to ensure a strong bond. Maintain consistent pressure throughout the process for evenly distributing heat across the entire iron-on patch.
Iron patches with care, applying heat with even pressure and with the iron moving in a slow circular motion position the iron to if the surface area of your iron is smaller than the patch ensuring every part of the patch receives adequate warmth. Iron over it for about 25–35 seconds, adjusting the time based on your fabric’s tolerance. This should be sufficient to activate the adhesive and securely affix the patch. Avoid heating the iron on the patch for too long as the adhesive backing can get too liquified and cause it to separate from the patch. (If this happens you can still sew on the patch)
For optimal bonding, iron patches by pressing at one section of the patch and gradually moving to other areas. Once you’ve finished heating, carefully lift the iron to avoid shifting the patch before the adhesive sets.
Secure the Edges of the Patch
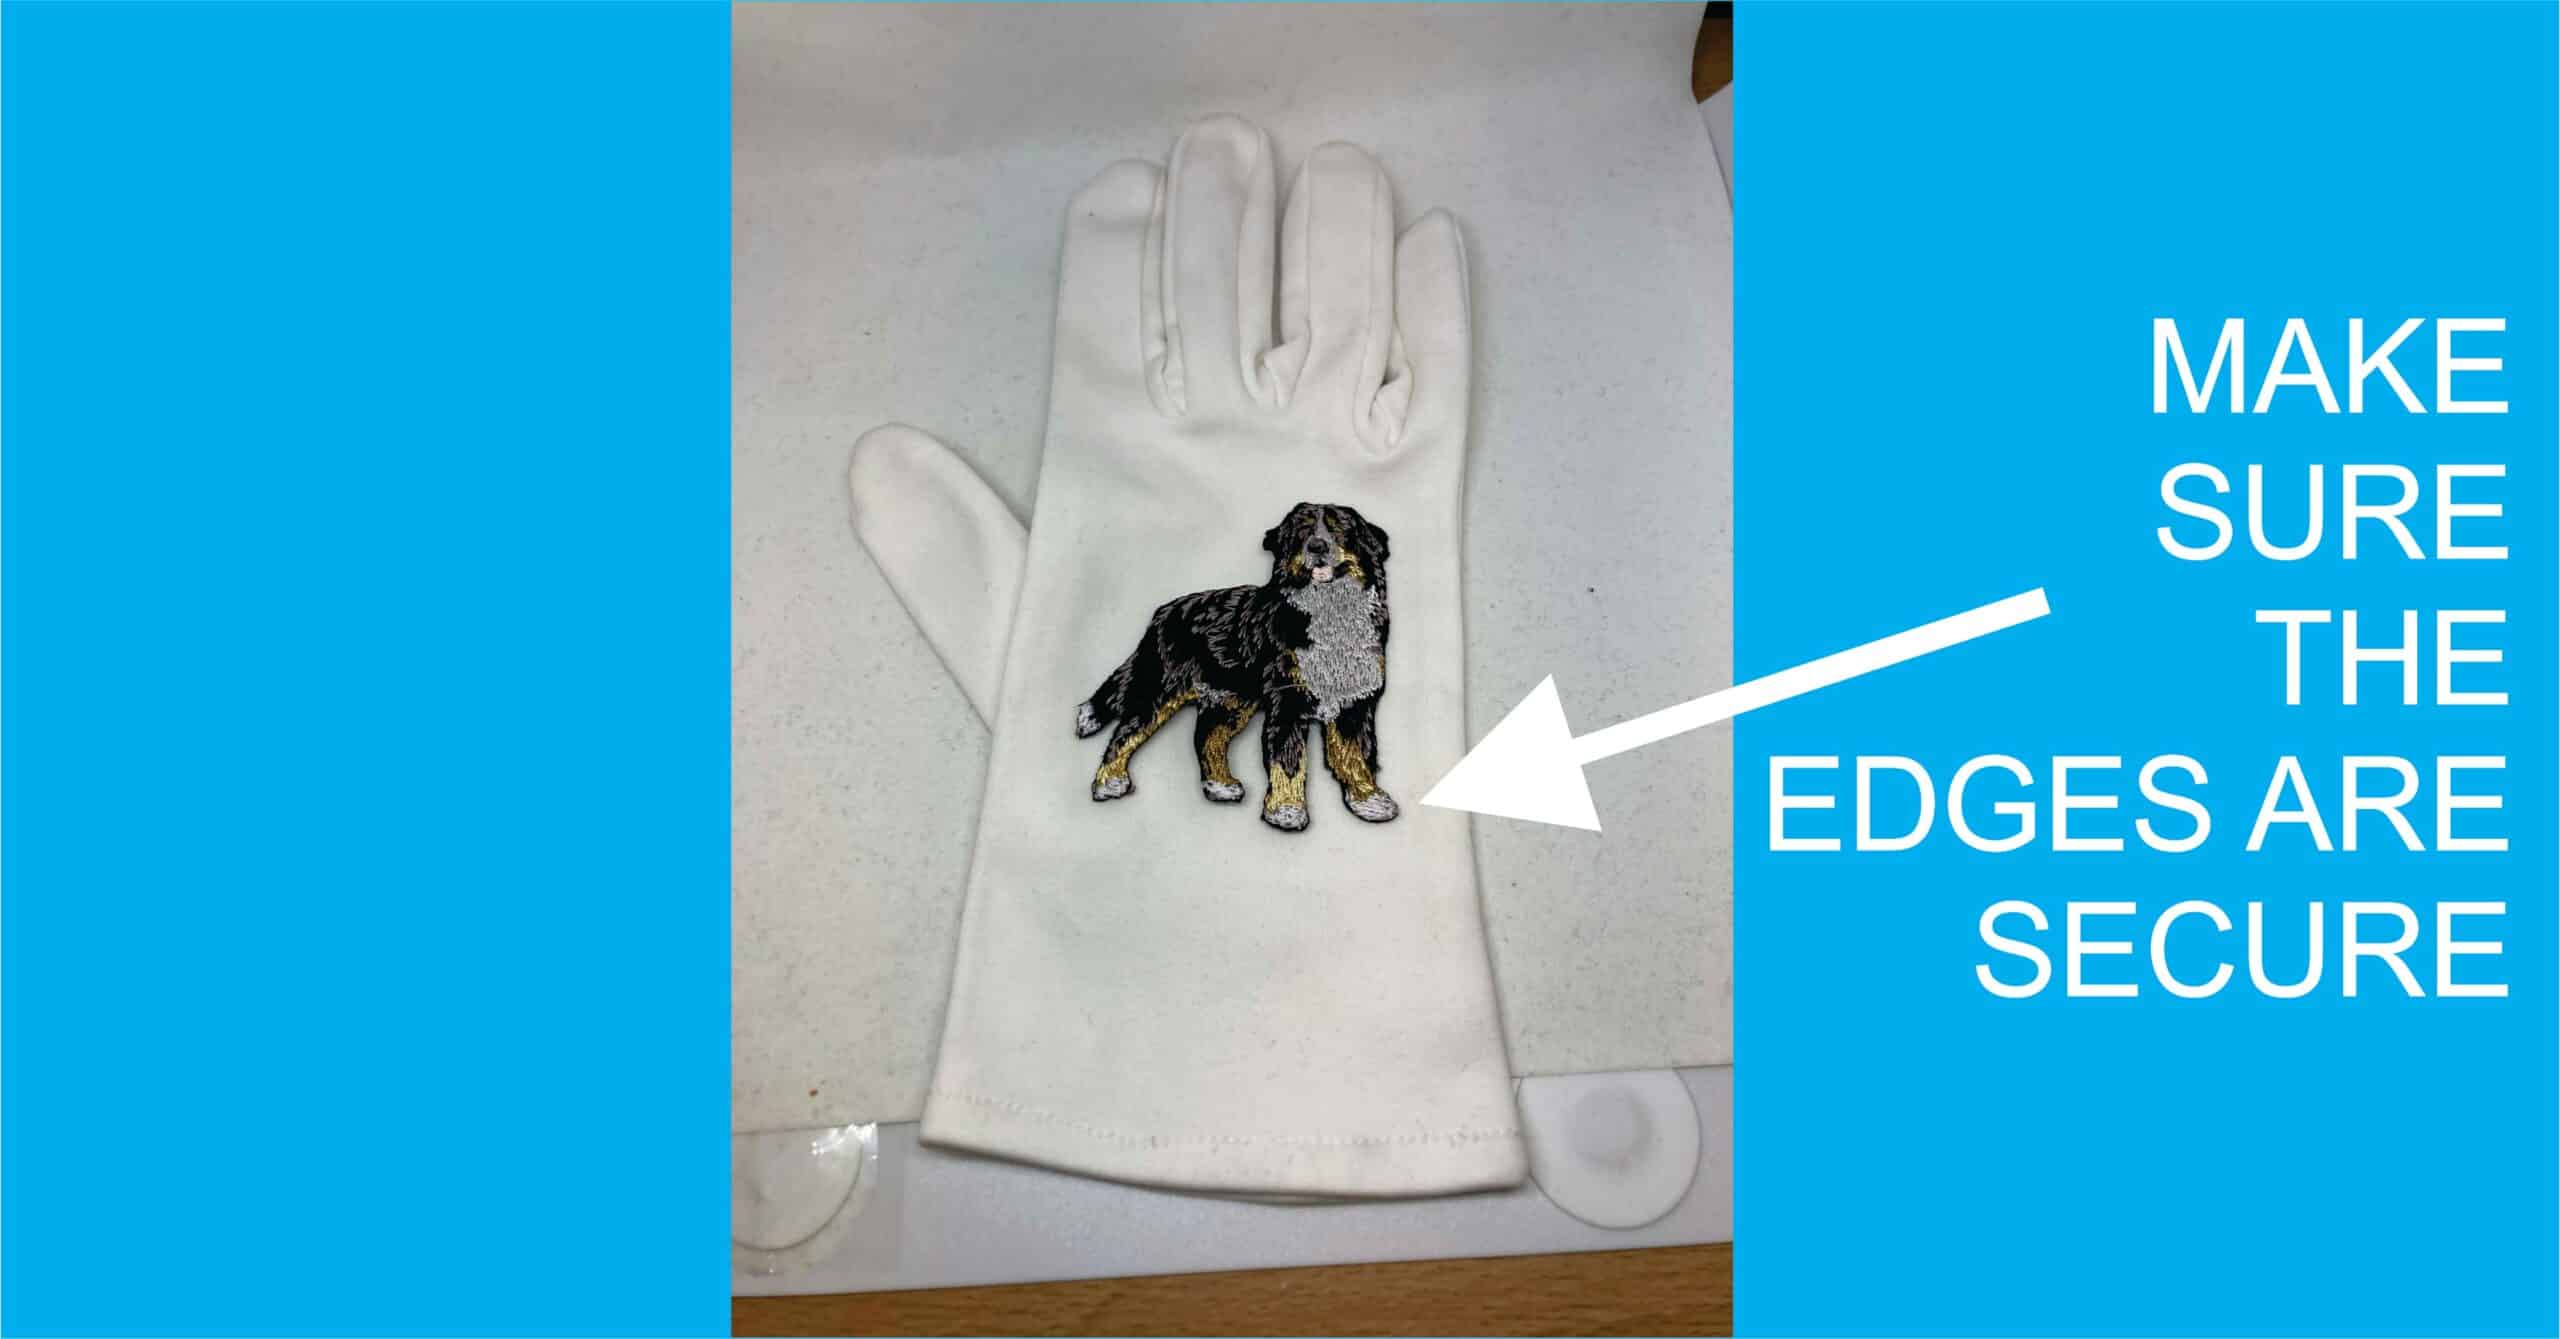
To ensure the durability of your patch, focus on firmly securing its edges. After the initial ironing, inspect the perimeter to confirm that the patch is fully adhered to the fabric. If any part begins to lift, reapply the heat and firm pressure for a few more seconds. Repeat this process as needed until the patch is securely fastened—taking your time will help achieve a strong bond. For patches that might be sharp or narrow the use of fabric glue may be required to keep it securely attached or to sew on the patch.
Be careful not to overheat. Excessive heat can cause the adhesive to bleed through the fabric, like butter melting into cloth, which may weaken the patch’s grip.
Once you are confident that all edges are tightly sealed, allow the patch to cool completely. Properly securing the edges is crucial for maintaining a long-lasting attachment. For some applications, a hair straightener can be used to provide heat from the garment inside to surround the patch area on the top and bottom
Examples of where a hair straightener might be a better tool than an iron would be on the cuff of a shirt or pants, especially if its clothes are made of denim.
Let the Garment Cool
After affixing the patch to your garment, allow both elements to cool flat and undisturbed. The adhesive needs at least five minutes to set correctly and be fully bonded between the patch and fabric.
Avoid handling or wearing the garment for at least 24 hours so that the patch will not peel off. This waiting period allows the adhesive to cure fully, ensuring the patch remains securely in place. Resisting the urge to move or manipulate the fabric prematurely will help maintain a firm attachment.
Once the cooling period has passed, inspect the patch, paying close attention to its edges. Ensuring they are fully secured will give you confidence that your patch will withstand daily wear without issue.
Additional Tips for Applying Patches to Different Fabrics
In related questions, different materials require specific methods for affixing patches. Cotton fabrics, such as those used in denim jackets, are ideal for iron-on patches since they can withstand the temperature necessary for secure attachment. Due to the thickness of denim heating from the garment inside is advisable. Place a moistened cloth over delicate fabrics to protect them during the application process. To prevent damage, start with the lowest iron temperature and gradually increase it. For best results, use an iron without the steam setting engaged. Exercise caution when working with synthetic materials like polyester and nylon, as high heat can cause damage. In these cases, alternatives such as fabric glue or stitching may be a better choice for attaching the patch securely.
Do not use hot temperature on synthetic fabrics as they will melt. A sew-on application is preferred.
Alternative Patch Attachment Methods
To secure thicker patches effectively, extra diligence is required. Begin by following the standard application steps. Then, after 24 hours, turn the garment inside out and apply heat to the underside of the patch. This allows heat to penetrate the thicker clothes more effectively, ensuring a stronger bond. Thicker patches are those with a depth of 1/8 inch or more. When applying heat, maintain consistent pressure for 25 to 35 seconds, then allow the garment to cool completely for another full day before wearing. This additional step reinforces the patch’s adhesion, helping it stay securely in place even after multiple washes. If the fabric is too thick you may want to sew or attach the patch with glue.
If ironing isn’t an option, there are alternative ways to attach patches. Here are a few:
Hand sewing is a durable and reliable method for keeping the patch securely in place.
Machine sewing is another effective option, providing both speed and precision.
For a no-iron solution, fabric adhesive creates a strong bond and works well on delicate materials.
Double-sided tape can be a temporary fix, but it lacks long-term durability.
Velcro patches offer flexibility, allowing you to switch designs without changing your garment permanently.
Consider these alternative methods to find the best fit for your project and fabric type. No matter the method, our custom patches provide high-quality designs that suit any application.
Summary
Applying iron-on patches is a fun and easy way to personalize your clothing. You can achieve a flawless finish every time by following the iron-on-patch instructions —from preparing your garment and patch to setting the correct iron temperature. Do not peel the patch while the garment is cooling and inspect that to ensure it has a secure bond. Whether you’re jazzing up a denim jacket or adding flair to a backpack, iron-on patches provide a creative outlet for personal expression. Remember you can sew on iron-on patches. So grab your embroidered patches, an iron, and start transforming your wardrobe today!
Frequently Asked Questions
Can I use steam when applying an iron-on patch?
No, stick to a dry iron for the best results when applying an iron-on patch. Steam can mess with the adhesive!
How do I know if my fabric can handle an iron-on patch?
Your fabric can handle an iron-on patch if the care label says it’s safe to iron. Just make sure to follow any specific instructions mentioned!
What should I do if the patch edges are lifting?
Just reapply some heat with firm pressure to those lifting edges—this should help them bond better.
Can I apply an iron-on patch to leather or nylon?
You can’t apply iron-on patches to leather or nylon fabrics; they just won’t stick properly. Sew patches onto leather or nylon as well as delicate fabrics, denim and heavy fabrics.
How long should I wait before using the garment after applying a patch?
You should wait about 24 hours before using the garment to let the adhesive cure properly. Trust me, it’s worth the wait!